


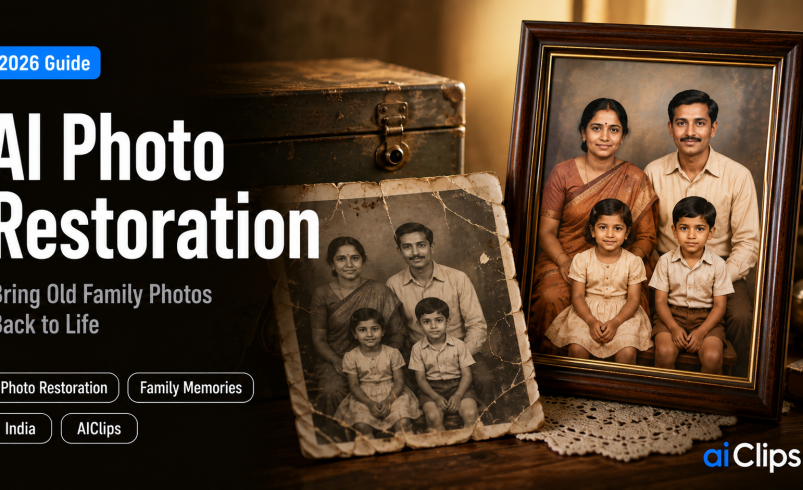

Somewhere in most Indian homes there is a steel trunk or a cupboard shelf with an album in it, and in that album are photographs slowly losing their fight with humidity. Faded edges, silverfish damage, a crease across your grandfather’s face, colours drained to a flat brown. Getting those repaired used to mean finding a studio and paying by the print. AI photo restoration now handles most of that damage in seconds, often free. This guide covers how AI photo restoration works, the right order to do things in, and the one honest limitation nobody tells you about colourisation.
That limitation is worth stating immediately, because it changes how you should treat the results. The AI does not recover the original colours of a black-and-white photo. It invents plausible ones. For a family keepsake that is usually fine and often lovely. For a historical record it is something you need to be careful about.
| What it fixes | Scratches, tears, creases, stains, water damage, fading, blur, and low resolution — roughly 90% of common damage. |
| How long | Seconds. Most online tools return a restored image in under a minute, with free tiers to start. |
| The right order | Repair damage first, then colourise, then enhance and upscale. Doing it backwards gives worse results. |
| Colour truth | Colourisation is a plausible guess, not a recovery. Skin tones and outdoor scenes are reliable; uniforms and unusual fabrics are not. |
| When to hire a human | Museum-grade archival work, or photos with extreme structural damage where every pixel matters. |
How AI Photo Restoration Actually Works
The old way of photo restoration was manual and slow. A retoucher cloned nearby pixels over a scratch, painted in missing corners by hand, and spent hours on a single image. That is why it cost what it cost.
What AI photo restoration does is different in kind, not just in speed. The model separates the damage from the picture — it identifies scratches, tears, and missing areas as damage rather than as content — and then reconstructs what belongs in those gaps by predicting from the surrounding textures and its understanding of the scene. It has learned from millions of photographs what a shoulder, a wall, or a sari border looks like, so it can fill a tear with something believable rather than a smear of adjacent pixels.
Faces get special treatment, and that is the part people notice most. Dedicated face models detect and reconstruct facial detail specifically, which is why AI photo restoration can bring a blurred, deteriorated portrait back into focus in a way general sharpening never could. It is also, as we will get to, the part that needs your closest inspection.
The Tools Worth Knowing
The photo restoration market has split into two camps, and knowing which you need saves a lot of wasted clicking. On one side are one-click online tools built for speed and ordinary people. On the other are specialist models built for particular kinds of damage.
For most family photographs, a general online restorer is all you need. These handle scratches, tears, fading, and blur in a single pass, often in under ten seconds, with free credits to start and no watermark on the output. Several also offer batch processing, which matters enormously if you are working through a whole album rather than a single print.
For colourisation specifically, dedicated colourisers tend to beat the colour feature buried inside a general tool, returning a result in around fifteen seconds with noticeably better skin tones. And for the hardest cases, purpose-built models exist: Microsoft Research Asia published one designed specifically for physical damage in old prints, and separate face-restoration models are what make blurred portraits recoverable at all. If you are technically inclined, chaining a face model with a general upscaler produces the best photo restoration results available outside a professional studio.
The practical advice is simple. Start with one good general tool. Only reach for the specialists when a particular photograph defeats it, which will be rarer than you expect.
The Right Order to Restore a Photo
This is the most practical thing in this guide and the part of photo restoration almost everyone gets wrong. Photo restoration is a sequence, not a single button, and running the steps out of order gives noticeably worse results. Repair the damage first, so the colouriser has clean information to work from. Colourise second. Enhance and upscale last.
| Damage type | Do this first |
|---|---|
| Torn or creased | Repair the tears before anything else, then continue normally |
| Water damage | Run noise reduction before attempting any colourisation |
| Faded colours | Colour restoration first, then apply enhancement |
| Yellowed prints | Colour correction before other steps |
| Blurry faces | A face-specific model first, then general upscaling for the background |
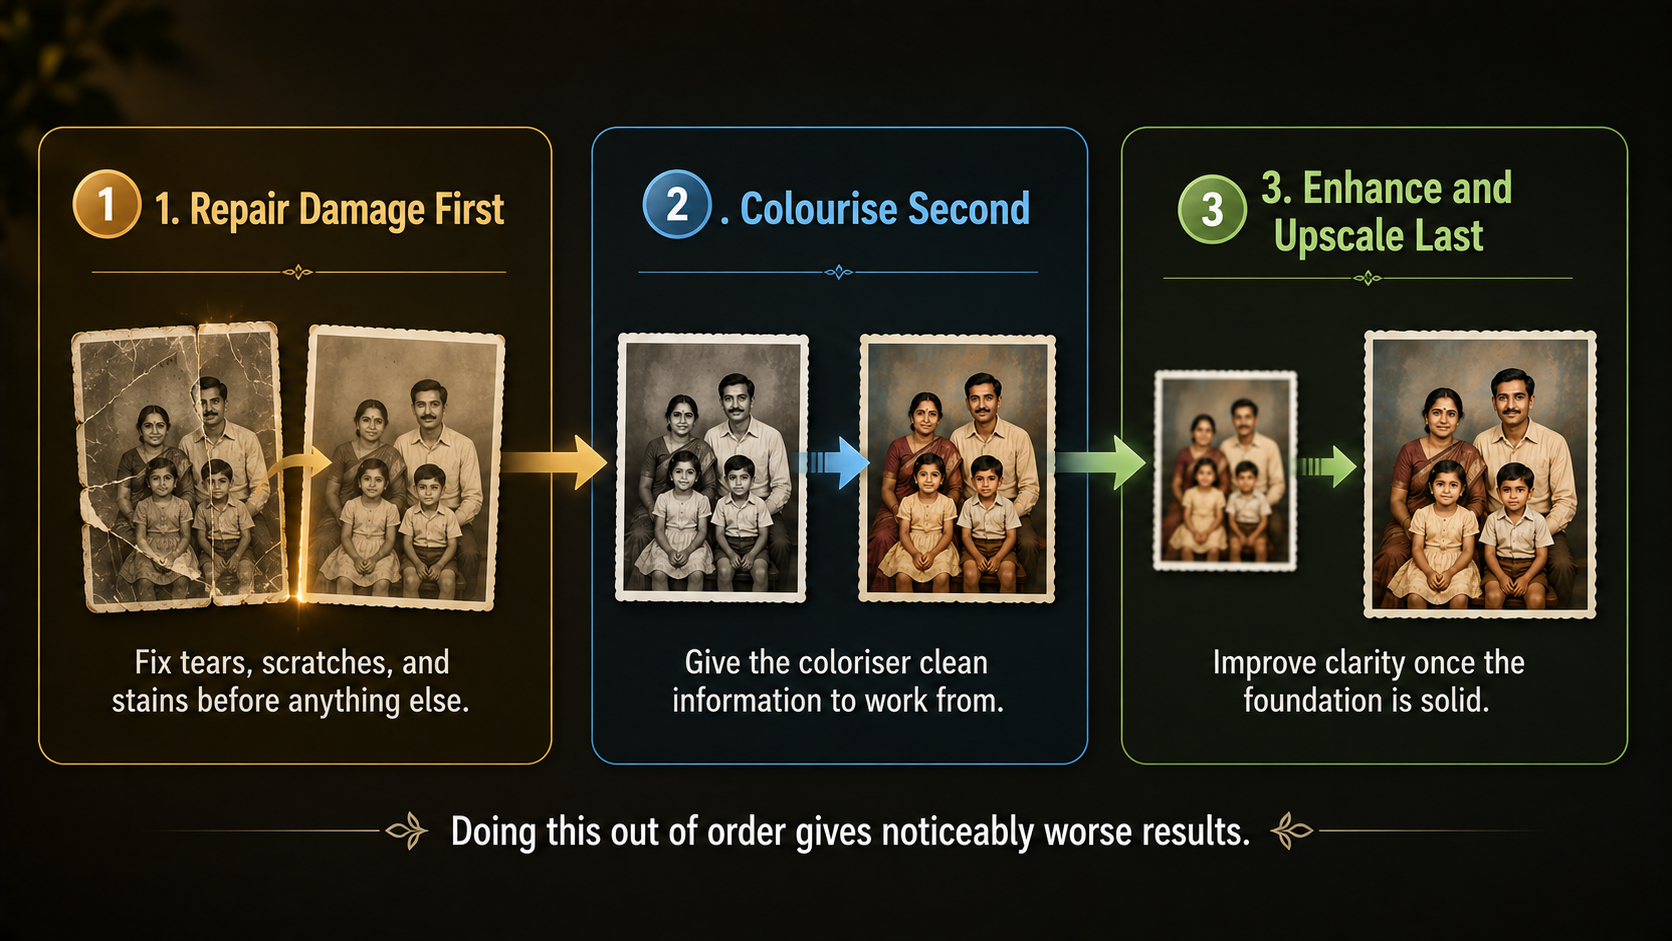
For a badly damaged photograph, the professional approach to photo restoration is to chain tools rather than expecting one to do everything. Scratch removal, then colourisation, then a general enhancement pass. Each step hands cleaner input to the next, and the compound result is far better than any single-click attempt.
Step by Step: Restoring Your First Photo
1. Scan It Properly CAPTURE
Everything downstream depends on this. Use a flatbed scanner at high resolution if you can. If you are using a phone, shoot in flat, even daylight, hold the camera parallel to the print, and avoid glare and shadows. A better scan means better AI photo restoration, every time.
2. Keep the Original Untouched ARCHIVE
Save the raw scan somewhere safe before you process anything. Photo restoration is interpretation, and you may want to try a different approach later or compare against the truth. The unedited scan is your archival record, so never overwrite it.
3. Repair the Damage FIX
Run the photo restoration pass to remove scratches, tears, stains, and creases. Most tools handle this in under a minute. Check the result at full zoom before moving on, because a missed tear will be baked into everything you do next.
4. Colourise if You Want To COLOUR
This is optional and it is the step with the biggest emotional payoff. A dedicated colouriser returns a colour version in around fifteen seconds. Try a couple of styles, and treat the output as an interpretation rather than a restoration of fact.
5. Enhance and Upscale SHARPEN
Finally, improve clarity and increase resolution. Upscaling is what lets you turn a wallet-sized print into something you can frame at poster size. Push it far enough for your intended use, but stop before the image starts looking artificial.
6. Inspect Faces at Full Zoom VERIFY
The non-negotiable final check. Zoom right into every face and look for over-smoothing, that waxy plastic finish, or features that have subtly changed. If a face no longer looks like the person, redo the step with a gentler setting. This check matters more than every other step combined.
The Honest Limits Nobody Mentions
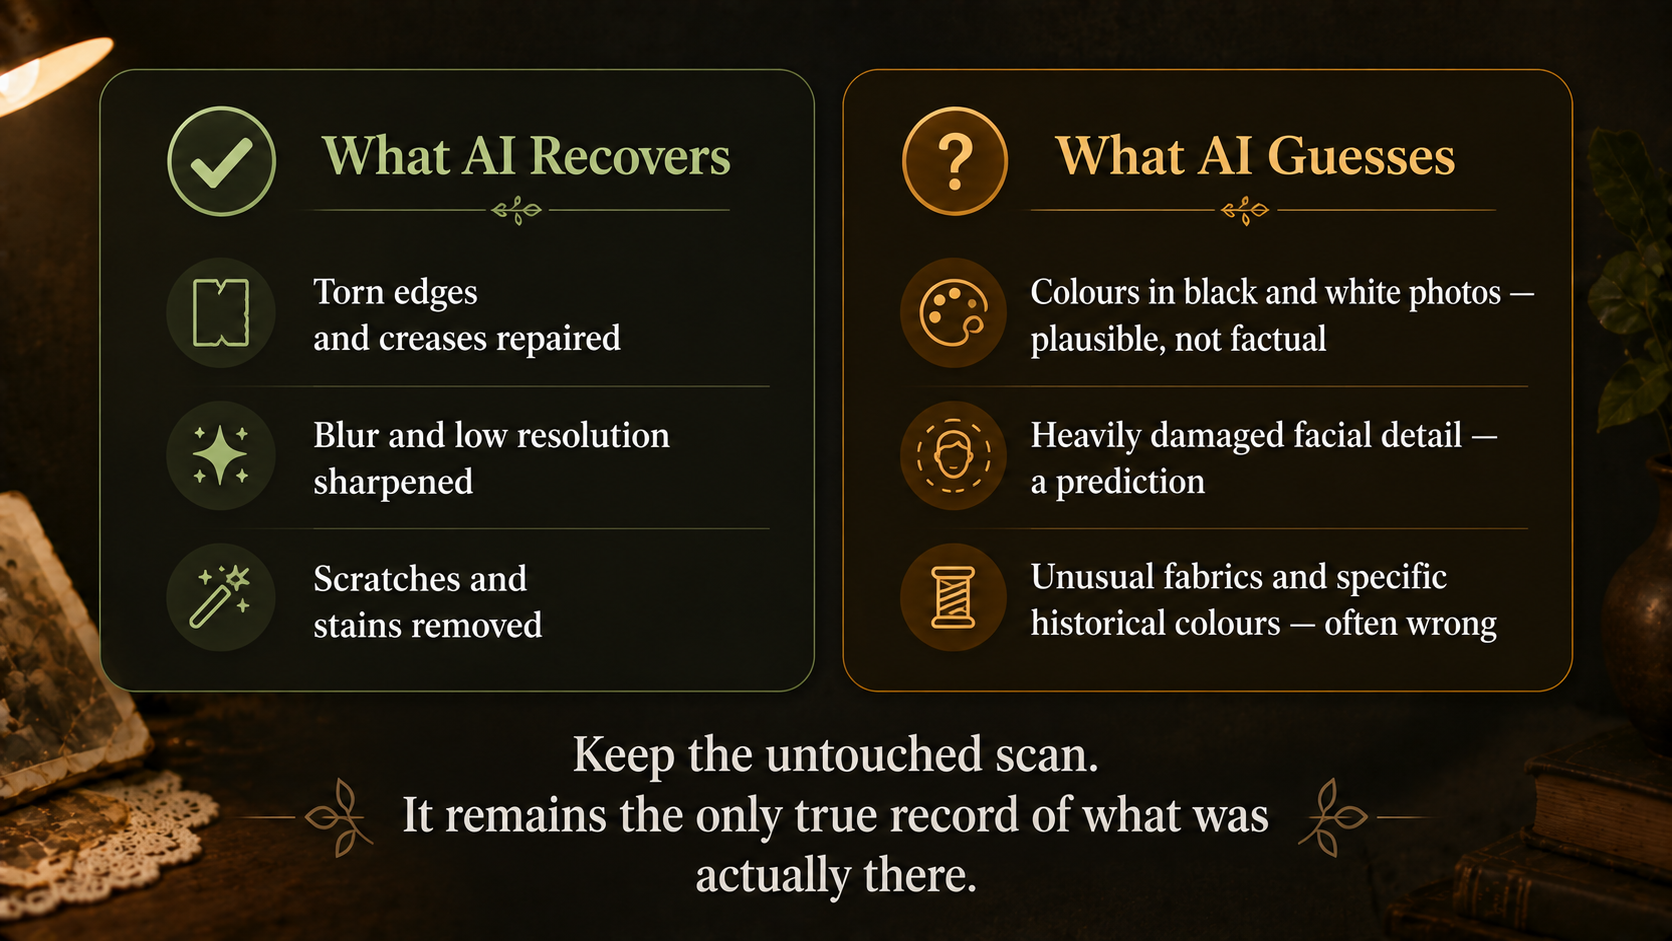
None of this means avoid AI photo restoration. It means treat the output as a respectful interpretation of a memory rather than a recovered original, and keep the untouched scan as your record of what was actually there. Do that and you keep the joy without quietly rewriting history.
When You Still Need a Human
AI photo restoration handles the overwhelming majority of everyday damage — the faded wedding photo, the creased portrait, the album page ruined by damp. What it is not built for is museum-grade archival work, or a photograph so structurally destroyed that large parts of it are simply gone. When every pixel carries historical weight, or when a third of the image is missing, a skilled human retoucher making deliberate, documented choices is still the right call.
For everything else, and that really is most things, the AI route gives you a result in seconds that would have cost a few thousand rupees and a week of waiting. Try the automated approach first. Escalate to a professional only for the handful of images where it genuinely falls short.
What to Do With Restored Photos
The photo restoration itself is rarely the end of the story, and this is where the emotional payoff really lands for families.
- Print and frame them. Upscaling means a tiny old print can become a large framed photograph without going mushy. This is the most common reason people start.
- Share them properly. A restored, colourised photo dropped into the family WhatsApp group tends to generate more reaction than anything else you will post that year.
- Build a family archive. Batch-process an entire album, label everything, and store it in the cloud. You are preserving something that physically will not survive another twenty years in that trunk.
- Use them for ancestry work. Restored portraits make family trees and genealogy records far more meaningful.
- Animate them, gently. Some tools can bring a still portrait into subtle motion. Used with care, it is a moving way to revisit someone. Used carelessly, it can feel disrespectful, so judge the room and the family.
Why This Matters More in India
There is a particular urgency to photo restoration here that guides written elsewhere miss entirely. Indian homes are hard on paper. Monsoon humidity, silverfish, loose album pages, and forty-degree summers do steady damage every single year, and most family albums were never stored in anything approaching archival conditions. The photograph of your grandparents’ wedding is deteriorating on a measurable schedule.
The other difference is how much these images carry. Many families have exactly one photograph of a grandparent, sometimes a single formal studio portrait taken decades ago. There is no negative, no backup, no second copy in a cousin’s house. When that print fades past legibility, the last visual record of a person goes with it. That is a very different stake from restoring a holiday snap.
Traditional studio restoration in India has always been available, but at a per-print price that made restoring a whole album unrealistic for most families. Free and low-cost AI photo restoration changes that arithmetic completely. An entire album can be scanned over a weekend and restored for effectively nothing, which puts preservation within reach of anyone with a phone.
Where AIClips Fits
Our lane here is specific, so let me name it plainly. There are excellent dedicated photo restoration tools, several with genuinely useful free tiers, and for a one-off damaged photograph they are the fastest route — use them. Where AIClips helps is when photo restoration is part of a bigger creative job: enhancing and upscaling images, generating supporting visuals, and turning restored photographs into video for a family tribute, an anniversary reel, or a memorial slideshow, across 461 models in one dashboard at ₹349/month with UPI. So restore the print wherever suits you, and build whatever you want around it on AIClips. Our AI image generator guide covers the image models in more depth.
The Bottom Line
AI photo restoration has quietly turned an expensive specialist service into something anyone can do on a phone in an evening. Scan carefully, keep the original untouched, repair before you colourise, and zoom into every face before you save. Follow that sequence and you will get results that genuinely surprise you.
Just hold the honesty alongside the delight. The colours are a plausible guess, the reconstructed faces are predictions, and the untouched scan remains the only true record of what the photograph was. Treated that way, photo restoration is one of the most quietly meaningful things AI does — not a productivity gain or a marketing tactic, but a grandmother’s face brought back into focus for a family that thought it was lost.
Frequently Asked Questions
Is AI photo restoration free?
Are the colours in a colourised photo accurate?
Can AI fix a badly torn photograph?
Why do restored faces sometimes look wrong?
How should I scan old photos for best results?
Can I turn restored photos into a video?
Turn Restored Memories Into Something Shareable
Enhance and upscale images, then build tribute videos with music and narration — 461 models, one dashboard, from ₹349/month.
Start on AIClips →