

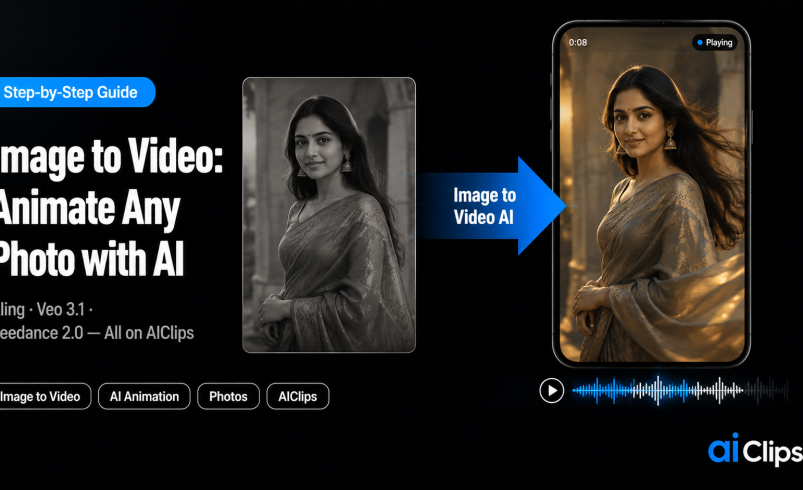

A still photo holds a single frozen moment. Image to video AI unfreezes it — the hair moves, the fabric folds, the light shifts, and a static picture becomes a living clip. It is not the same as generating a video from text. Here, the AI keeps your exact photo — its composition, its lighting, its faces — and only adds motion. This guide shows how to do it well, from the one thing that matters most to the mistakes that quietly waste your credits.
Old family photos, product stills, portraits, thumbnails, landscapes — with image to video, almost any image can be brought to life. The results range from magical to melted, and the difference comes down to a few choices you make before you ever hit generate.
| What it is | AI that animates a still photo, keeping its composition, lighting, and identity, and adding realistic motion. |
| Not the same as | Text-to-video, which builds a scene from scratch. Image to video preserves your exact frame. |
| What matters most | The reference image. A weak photo produces weak output no matter how good your prompt is. |
| Best models | Kling for motion, Veo 3.1 for realism, Seedance 2.0 for character consistency. |
| On AIClips | Run all three from one dashboard, ₹349/month with UPI. |
What Image to Video Actually Does
Image to video takes your photo and adds motion while keeping everything else locked. Think of it less as “generate a video” and more as breathing life into one exact frame. Your composition, your subject’s face, and your lighting stay as they are. The AI’s only job is movement, and modern models do it by interpreting the real physical space inside the image — hair blows, fabric folds, water flows, and it does not look like a cheap animation effect.
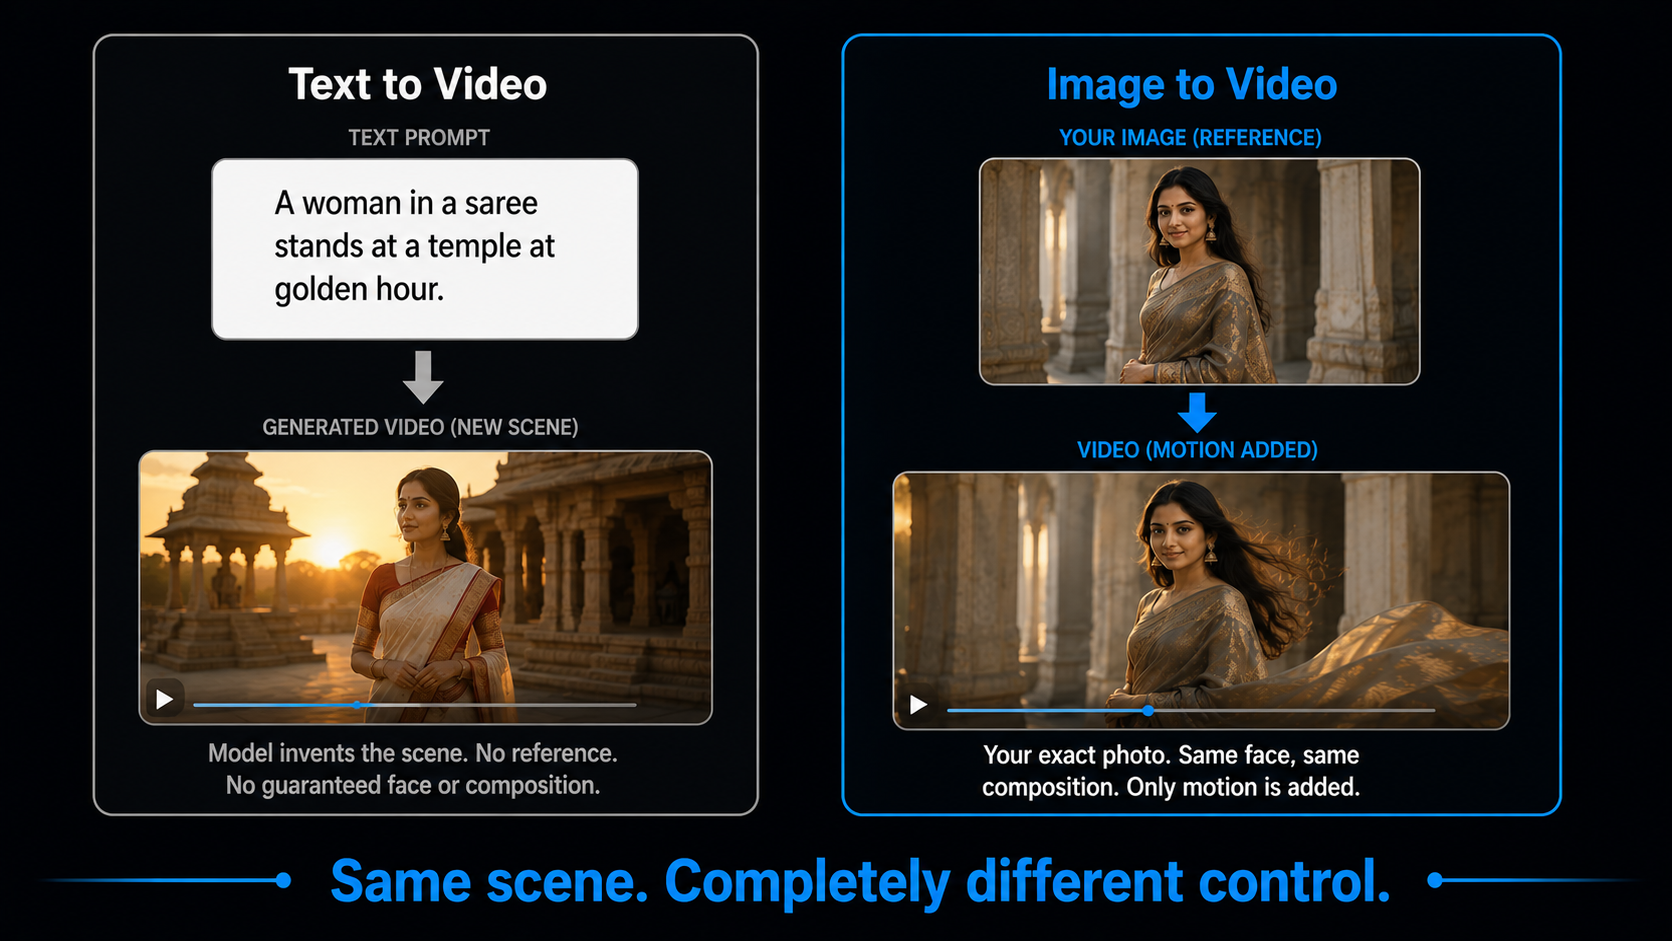
This is the opposite of text-to-video, where the model builds a whole scene from your written description. Because image to video preserves the visual identity before it generates anything, it is the more reliable mode for production work. If a specific face or product has to stay exactly right, image to video is how you keep it locked.
The Reference Image Is Everything
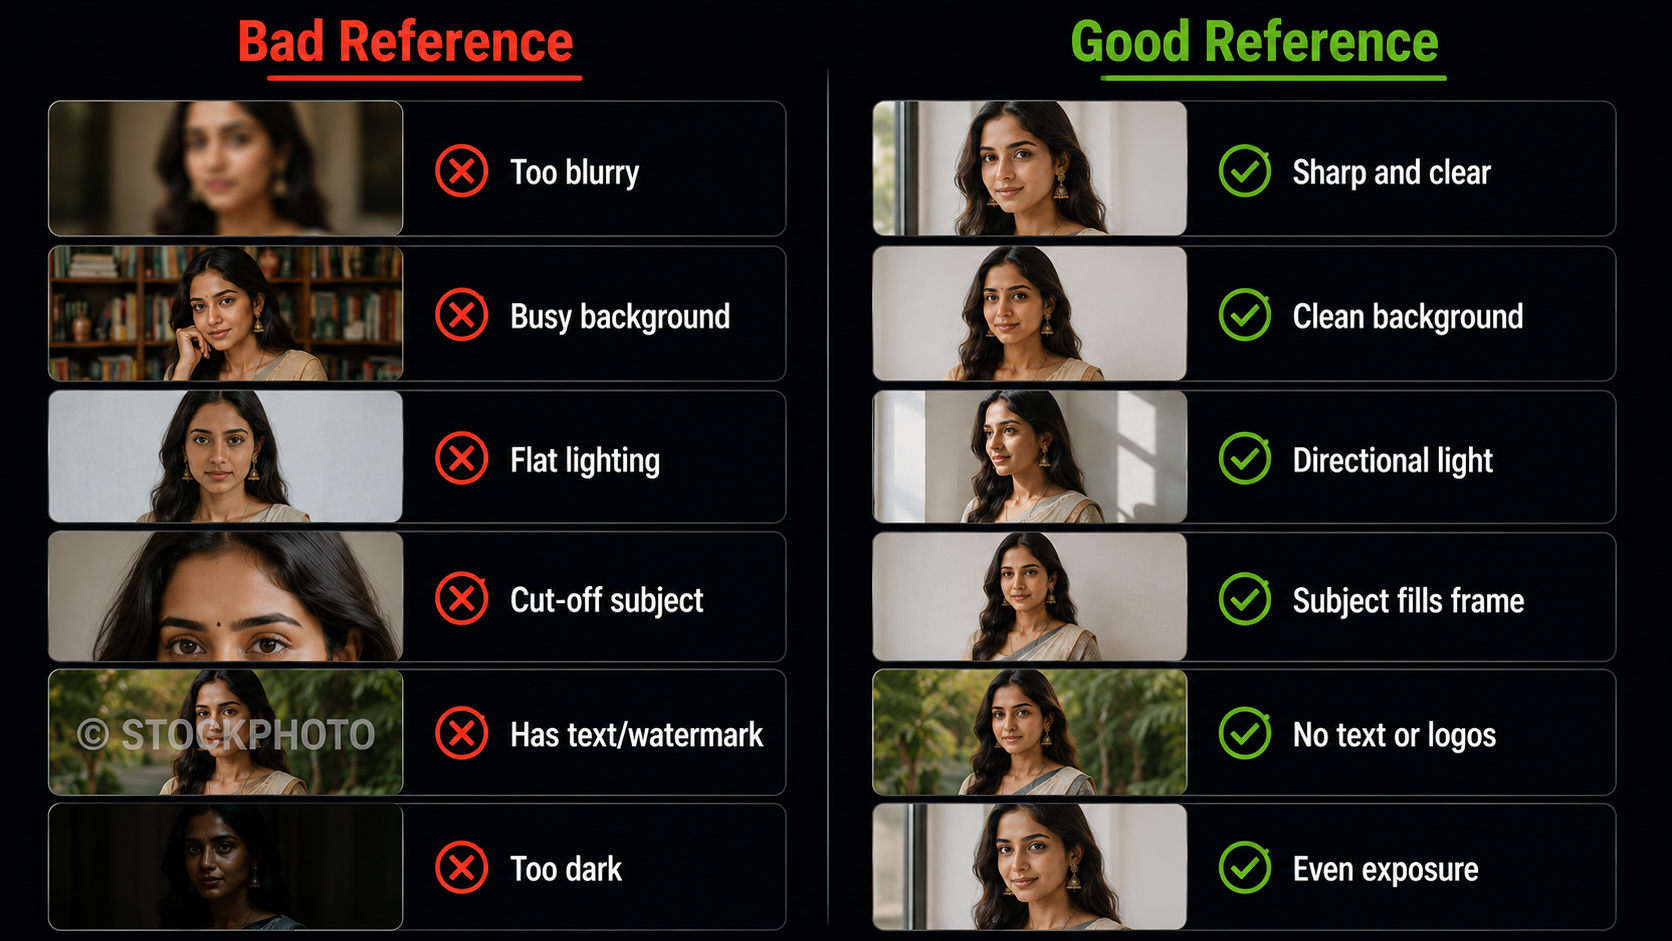
Here is the single most important thing in this entire guide. The reference image decides the outcome more than the prompt, the model, or the settings. A bad reference produces bad output every time. Get this right and most clips are usable on the first or second try.
- Use a sharp, high-resolution photo. Aim for at least 720 pixels on the short side. If it is soft, sharpen it first — the AI will animate blur, not fix it.
- Keep the background simple. Busy, cluttered backgrounds animate unpredictably. A clean or gradient background keeps the motion on your subject.
- Use directional lighting. Flat, even light produces flat video. Side lighting and visible shadows create natural depth once things move.
- Let the subject fill the frame with a little breathing room. Cut-off subjects and extreme close-ups confuse the model’s edge detection.
- Remove text and logos. Captions, watermarks, and labels distort badly when animated. Strip them from the source first.
How to Animate a Photo, Step by Step
1. Prepare Your Reference Image FOUNDATION
Apply the checklist above before you upload anything. Sharp, well-lit, clean background, subject filling the frame, no text overlays. Five minutes here saves a dozen wasted generations later.
2. Pick Your Model CHOOSE
On AIClips you can choose per job. Kling for fluid, physical motion, Veo 3.1 when realism and audio matter, Seedance 2.0 when you need a character to stay consistent across a longer clip. Different photos suit different models.
3. Write a Motion-Only Prompt PROMPT
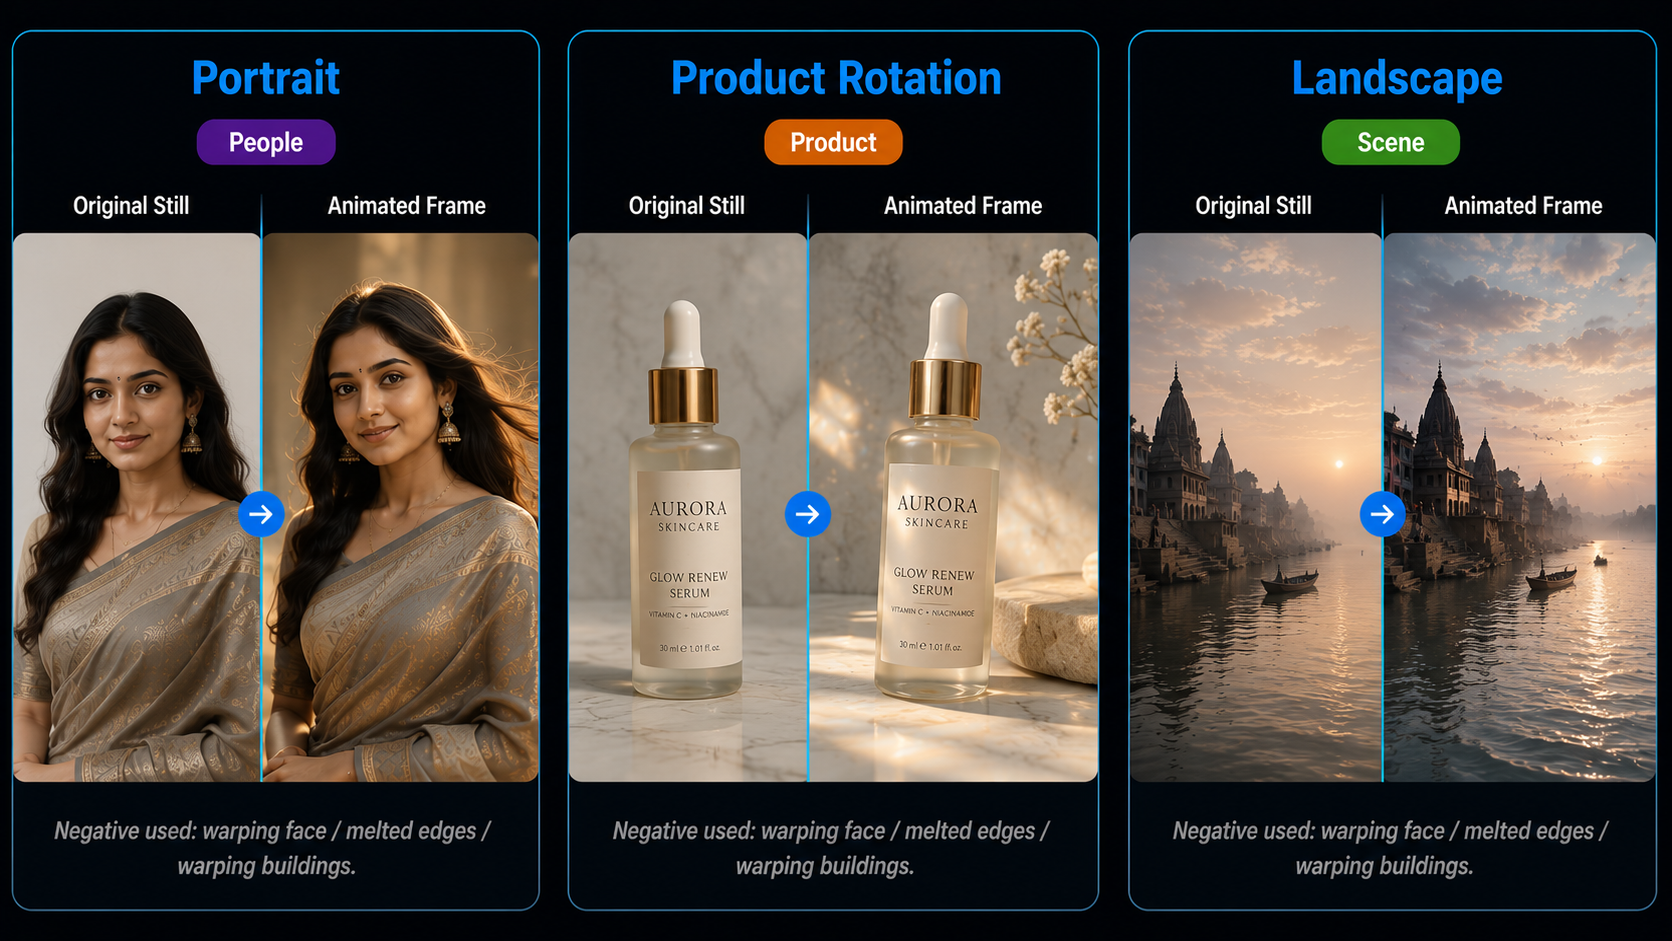
This is where people new to the format go wrong. The scene already exists in your image, so do not describe it again. Describe only what should move — “gentle motion in the curtains, hair drifting in a light breeze” — and the camera move you want, like a slow push in or a 30-degree orbit.
4. Add Negative Prompts PROTECT
Tell the model what to avoid. A short negative prompt like “warping fingers, frozen lips, jittery motion, melted edges” heads off the most common failures before they happen.
5. Generate, Review, Iterate REFINE
Test at a short, standard-quality setting first — five seconds is enough to see if the motion works. Check the face and any hands, then re-render at full quality once it looks right. Change one thing per attempt.
Motion Prompts That Work
Portrait PEOPLE
Product Rotation PRODUCT
Landscape or Old Photo SCENE
Where It Still Struggles
What This Costs in India
| Option | Price | Notes |
|---|---|---|
| Free tiers | ₹0 | Daily credits, good for learning the motion prompts |
| AIClips Creator | ₹349 / month | Kling, Veo, Seedance image to video in one place, UPI |
| Separate model subscriptions | $10–40 / month each | Per-tool, dollar billing, foreign card |
Because usable clips often take a couple of attempts, running several video models on one rupee bill and switching between them is far cheaper than paying separate subscriptions. The natural pairing is to generate a still with an image model, then animate it — see our AI image generator guide for the first half, and our best AI video generators guide for the models that animate it.
Frequently Asked Questions
What is the difference between image to video and text to video?
What makes a good reference image?
How do I write a good image to video prompt?
Can I bring old photos to life with AI?
Why do the hands look wrong in my clip?
Animate Your Photos on AIClips
Image to video with Kling, Veo, and Seedance, plus 458 other models. INR pricing, UPI, from ₹349/month.
Start on AIClips →